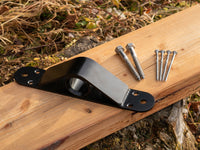
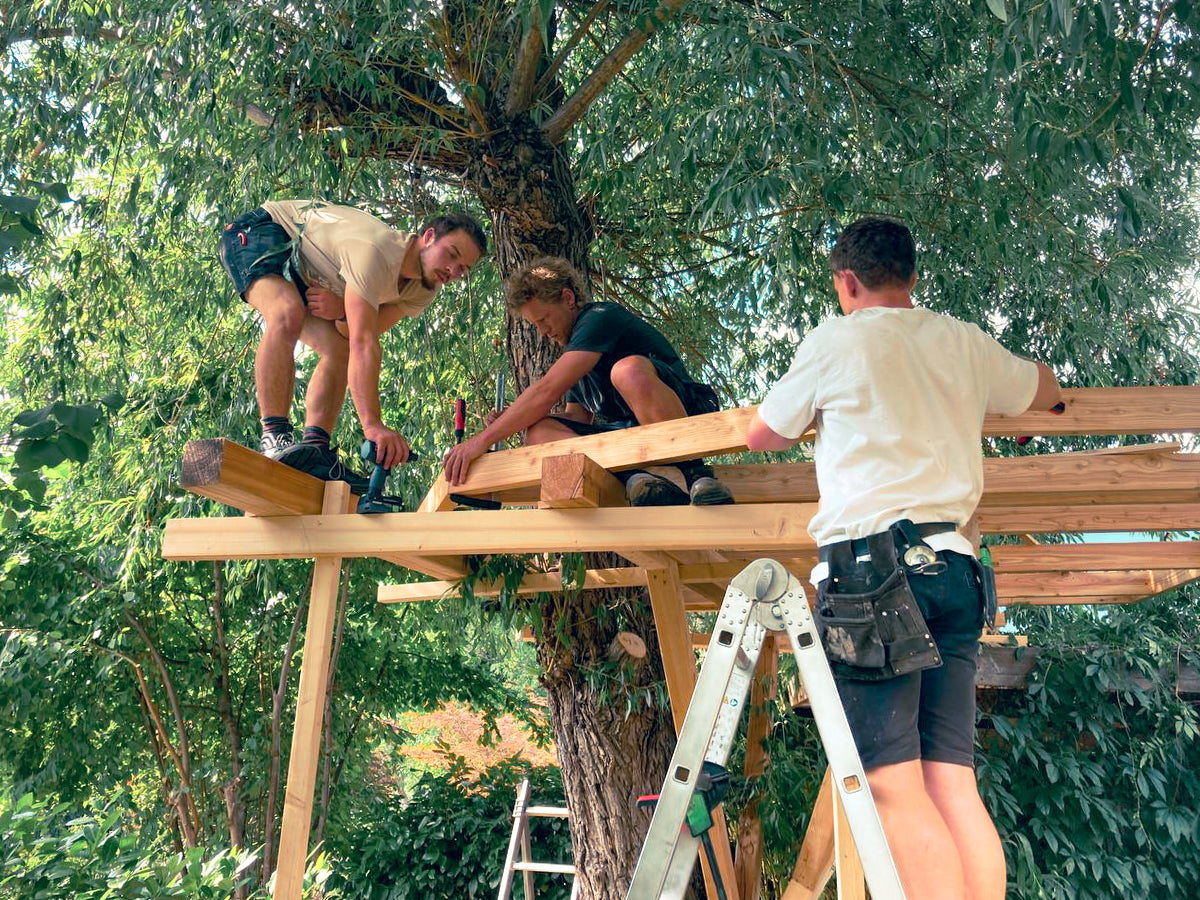
You are here: Home / Service / Installation Instructions / Struts

Struts

Please observe the load limit!

  • The individual struts should not be loaded higher than 700 kg, depending on the timber cross-section and beam length.
  • The struts may only be loaded in compression.

Strut Accessories are intended for supporting bracing and as additional reinforcement of load-bearing elements (e.g. to prevent platform or spiral staircase from tipping over). Struts should not be used alone as main beams!


Tool list

  • “Strut Accessories” + corresponding GTS to attach Strut
  • Strong cordless screwdriver (4 Ah , 18 V)
  • Auger Drill ø 24 mm
  • Spanner SW 36 mm or pipe spanner (plate)
  • 5 wood screws to fix the beam to the plate


Mounting

There are three ways to determine the length and angle of the wooden strut. Regardless of which option you choose, you always start with the plate almost completely screwed in:

Option 1: The GTS tree screw determines the position.

Here you need to determine where the strut should be attached to the top of the platform. Then stretch a string between the strut plate (fully screwed in) and the attachment point on the platform and measure the length and angle of the wooden beam.

Option 2: You first determine the angle and the attachment point on the platform.

Hold the strut against the platform so that the strut (with the plate completely screwed in) is against the tree. Mark the hole and fix the struts at the top and bottom.

Option 3: You use the “Strut Support Platform” at the top.

With this option you only have to roughly cut your strut to length, both angles can be 90°.

Tip: If you are not 100% sure, approach the angle and length of the strut piece by piece.

After you have sawn the wooden beam to size, drill a 23 cm deep hole in the centre of the end grain of the beam using the “ø 24mm Auger Drill”. This is where the fine thread of the strut is inserted.

Tip: Drilling straight and centrally into the end grain of the wooden beam with the snake bit is not so easy – we recommend that you practise on a section before you attempt to drill the real beam. As always, it works best with two people.

Then attach the wooden beam to the tree and platform at the bottom and top, turn the plate upwards with an open-end spanner SW36 or a pipe spanner and clamp the strut tightly. Wait until the platform is fully loaded, the Strut may sink a little. Then clamp the plate again and secure the wooden beam with 5 wood screws.

At the platform, the strut should be additionally secured with angle plates.

Steel struts

Of course you can also use filigree steel tubes instead of the thick wooden struts. To do this, simply remove the plate from the nut and push a steel tube onto the fine thread of the strut holder. You can then tighten the steel tube with the nuts.

A PDF on the use of steel tube struts can be found here.

TREEHOUSE SCREWS

SCREW ACCESSORIES

Treehouse Assembly Kits

TREEHOUSE ASSEMBLY KITS

TOOLS

SALE

Treehouse Soft Goods - Clothes, Books, Goodies

SOFT GOODS

GERMAN TREEHOUSE SCREW

OUR PRODUCT GUIDE

ATTACHMENT METHODS

SUPPORTING ELEMENTS

what does a platform construction look like treehouse shop

PLATFORM CONSTRUCTIONS

TREEHOUSE DESIGN

Wie groß kann mein Baumhaus werden Gewicht Größe Bau Dimensionen treehouse shop

HOW BIG CAN IT GET?

Brauche ich eine Genehmigung für meinen Baumhaus Bau

BUILDING LAW & PERMIT

TREEHOUSE COSTS

what does a platform construction look like treehouse shop

WHICH TREE IS BEST?

what does a platform construction look like treehouse shop

DO SCREWS HARM THE TREE?

100% MADE IN GERMANY

WE ARE: THE TREEHOUSE SHOP

Treehouse Customer Self Build DIY

WHAT OUR CUSTOMERS SAY

Treehouse Blog

BLOG

WE WILL BUILD YOUR TREEHOUSE!

INSTALLATION INSTRUCTIONS

FAQ

Hi treehouse friends!

We will be happy to help you! Please check our FAQ section first – there, we have already answered the most common questions for you.

In order to be able to advise you optimally, we need:

  • Sketches (drawn by hand is OK)
  • Position and height of the platform
  • Position and size of the treehouse
  • Photos of the trees
  • Tree diameter ø at the height of the platform
  • Tree species
  • Distance between trees (if more than one)
  • Use of the treehouse (many people, public, …)
  • Particularly stormy or snowy region?


“Since I often hang in trees or work with loud machines, it's best to contact me via email. The more concrete your idea and the more detailed the description, the better I can help you – thank you!”

Vitus Wahlländer - Owner of TheTreehouse.Shop

+49 17623339648

www.thetreehouse.shop

Dürnbachstraße 16a, 83727 Schliersee, Germany

Kontaktiere uns!

Gerne helfen wir Dir weiter. Bitte check vorher unseren FAQ-Bereich, dort haben wir die gängigsten Fragen bereits beantwortet.

Um Dich optimal beraten zu können, benötigen wir:

  • Skizzen (gerne von Hand gekritzelt)
  • Lage und Höhe der Plattform
  • Position und Größe des Baumhauses
  • Fotos von den Bäumen
  • Baumdurchmesser ø auf Höhe der Plattform
  • Baumart
  • Abstand der Bäume (falls mehrere)
  • Nutzen vom Baumhaus (viele Personen, öffentlich, …)
  • Besonders Sturm oder Schneereiche Region?


„Da ich oft in den Bäumen hänge oder mit lauten Maschinen arbeite, kontaktiere mich am besten via E-Mail. Je konkreter Deine Idee und je detaillierter die Beschreibung, desto besser kann ich Dir weiterhelfen – Danke!“


Vitus Wahlländer – Chef 

+49 17623339648

www.thetreehouse.shop

Dürnbachstraße 16a, 83727 Schliersee, Deutschland

0
    0
    Warenkorb
    Der Warenkorb ist leer.Zurück zum Shop